Create Schedule
Last updated on May 08, 2026
Create a Schedule
Schedules are used to manage class timetables, private training sessions, court bookings, and other appointment-based services.
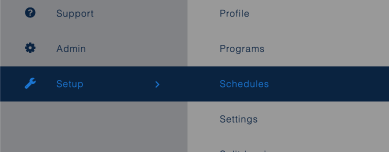
Navigating to Schedules
- Click Setup in the left-hand navigation sidebar.
- Click Schedules.
The Schedules page displays a list of all existing schedules, searchable by Status (defaults to Active). The list shows each schedule's Name, Type, and Status, along with Edit and Member Permissions action links.
Creating a New Schedule
Click Add New to open the schedule creation screen. The screen is divided into four sections.
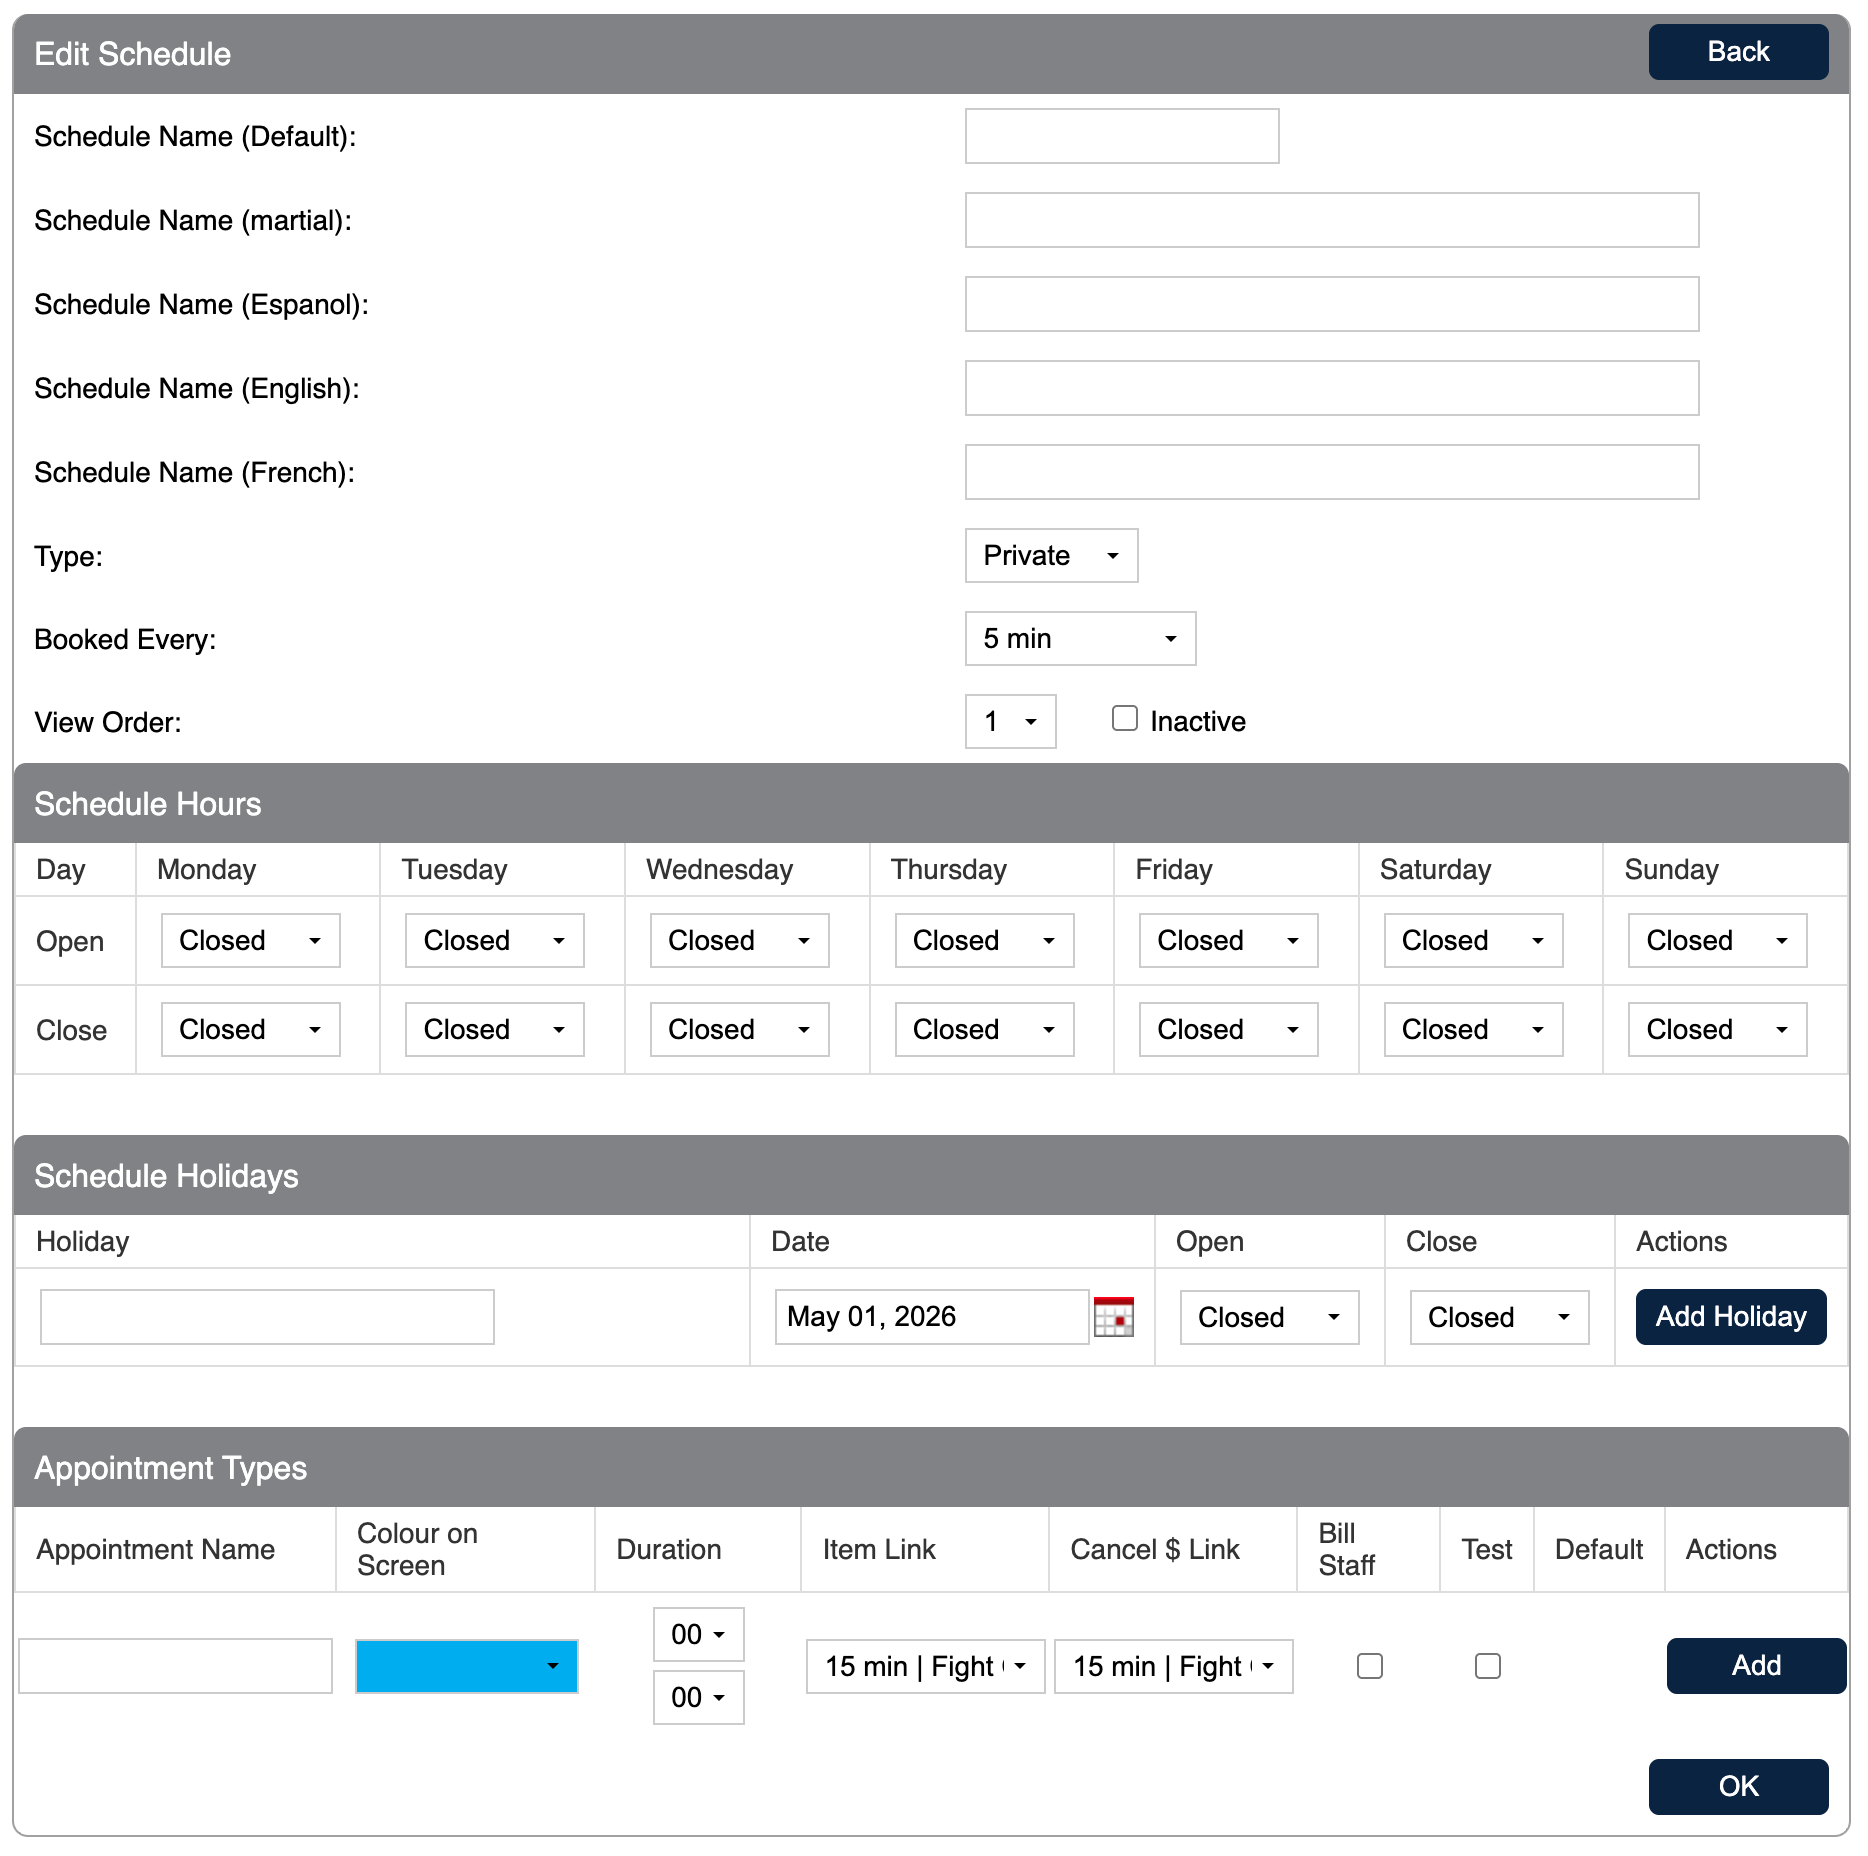
Schedule Information
| Field | Description |
|---|---|
| Schedule Name (Default) | The default name of the schedule. |
| Schedule Name (martial) | An alternate name for martial arts contexts. |
| Schedule Name (Espanol) | The Spanish-language name for the schedule. |
| Schedule Name (English) | The English-language name for the schedule. |
| Schedule Name (French) | The French-language name for the schedule. |
| Type | The type of schedule: Private (viewed by staff member — most often used for personal training sessions), Class (viewed by location — most often used for aerobics, yoga, and similar classes), Court (viewed by location — most often used for space rentals), or Massage (viewed by staff member, similar to Private but a location is required). |
| Booked Every | The booking interval — how frequently appointments can be scheduled (e.g., every 5 minutes). |
| View Order | The display order of this schedule relative to others. |
| Inactive | Check to mark the schedule as inactive. |
Schedule Hours
Set the opening and closing times for each day of the week. Each day can be set to Closed or a specific open/close time. Days default to Closed.
Schedule Holidays
Add holiday closures to the schedule. For each holiday, enter a Holiday name, Date, and the Open and Close times for that day (or set to Closed). Click Add Holiday to save the entry.
Appointment Types
Add the types of appointments available on this schedule. For each appointment type, fill in the following:
| Field | Description |
|---|---|
| Appointment Name | The name of the appointment type. |
| Colour on Screen | The colour used to display this appointment type on the schedule. |
| Duration | The length of the appointment (hours and minutes). |
| Item Link | The inventory item linked to this appointment type for billing purposes. |
| Cancel $ Link | The item charged if the appointment is cancelled. |
| Bill Staff | Check if the staff member should be billed for this appointment type. |
| Test | Check to mark this as a test appointment type. |
| Default | Check to set this as the default appointment type for the schedule. |
Click Add to save the appointment type. Multiple appointment types can be added to a single schedule.
Click OK to save the schedule, or Back to return without saving.
Member Permissions
Clicking Member Permissions from the Schedules list opens the permissions screen for that schedule. It is divided into two sections.
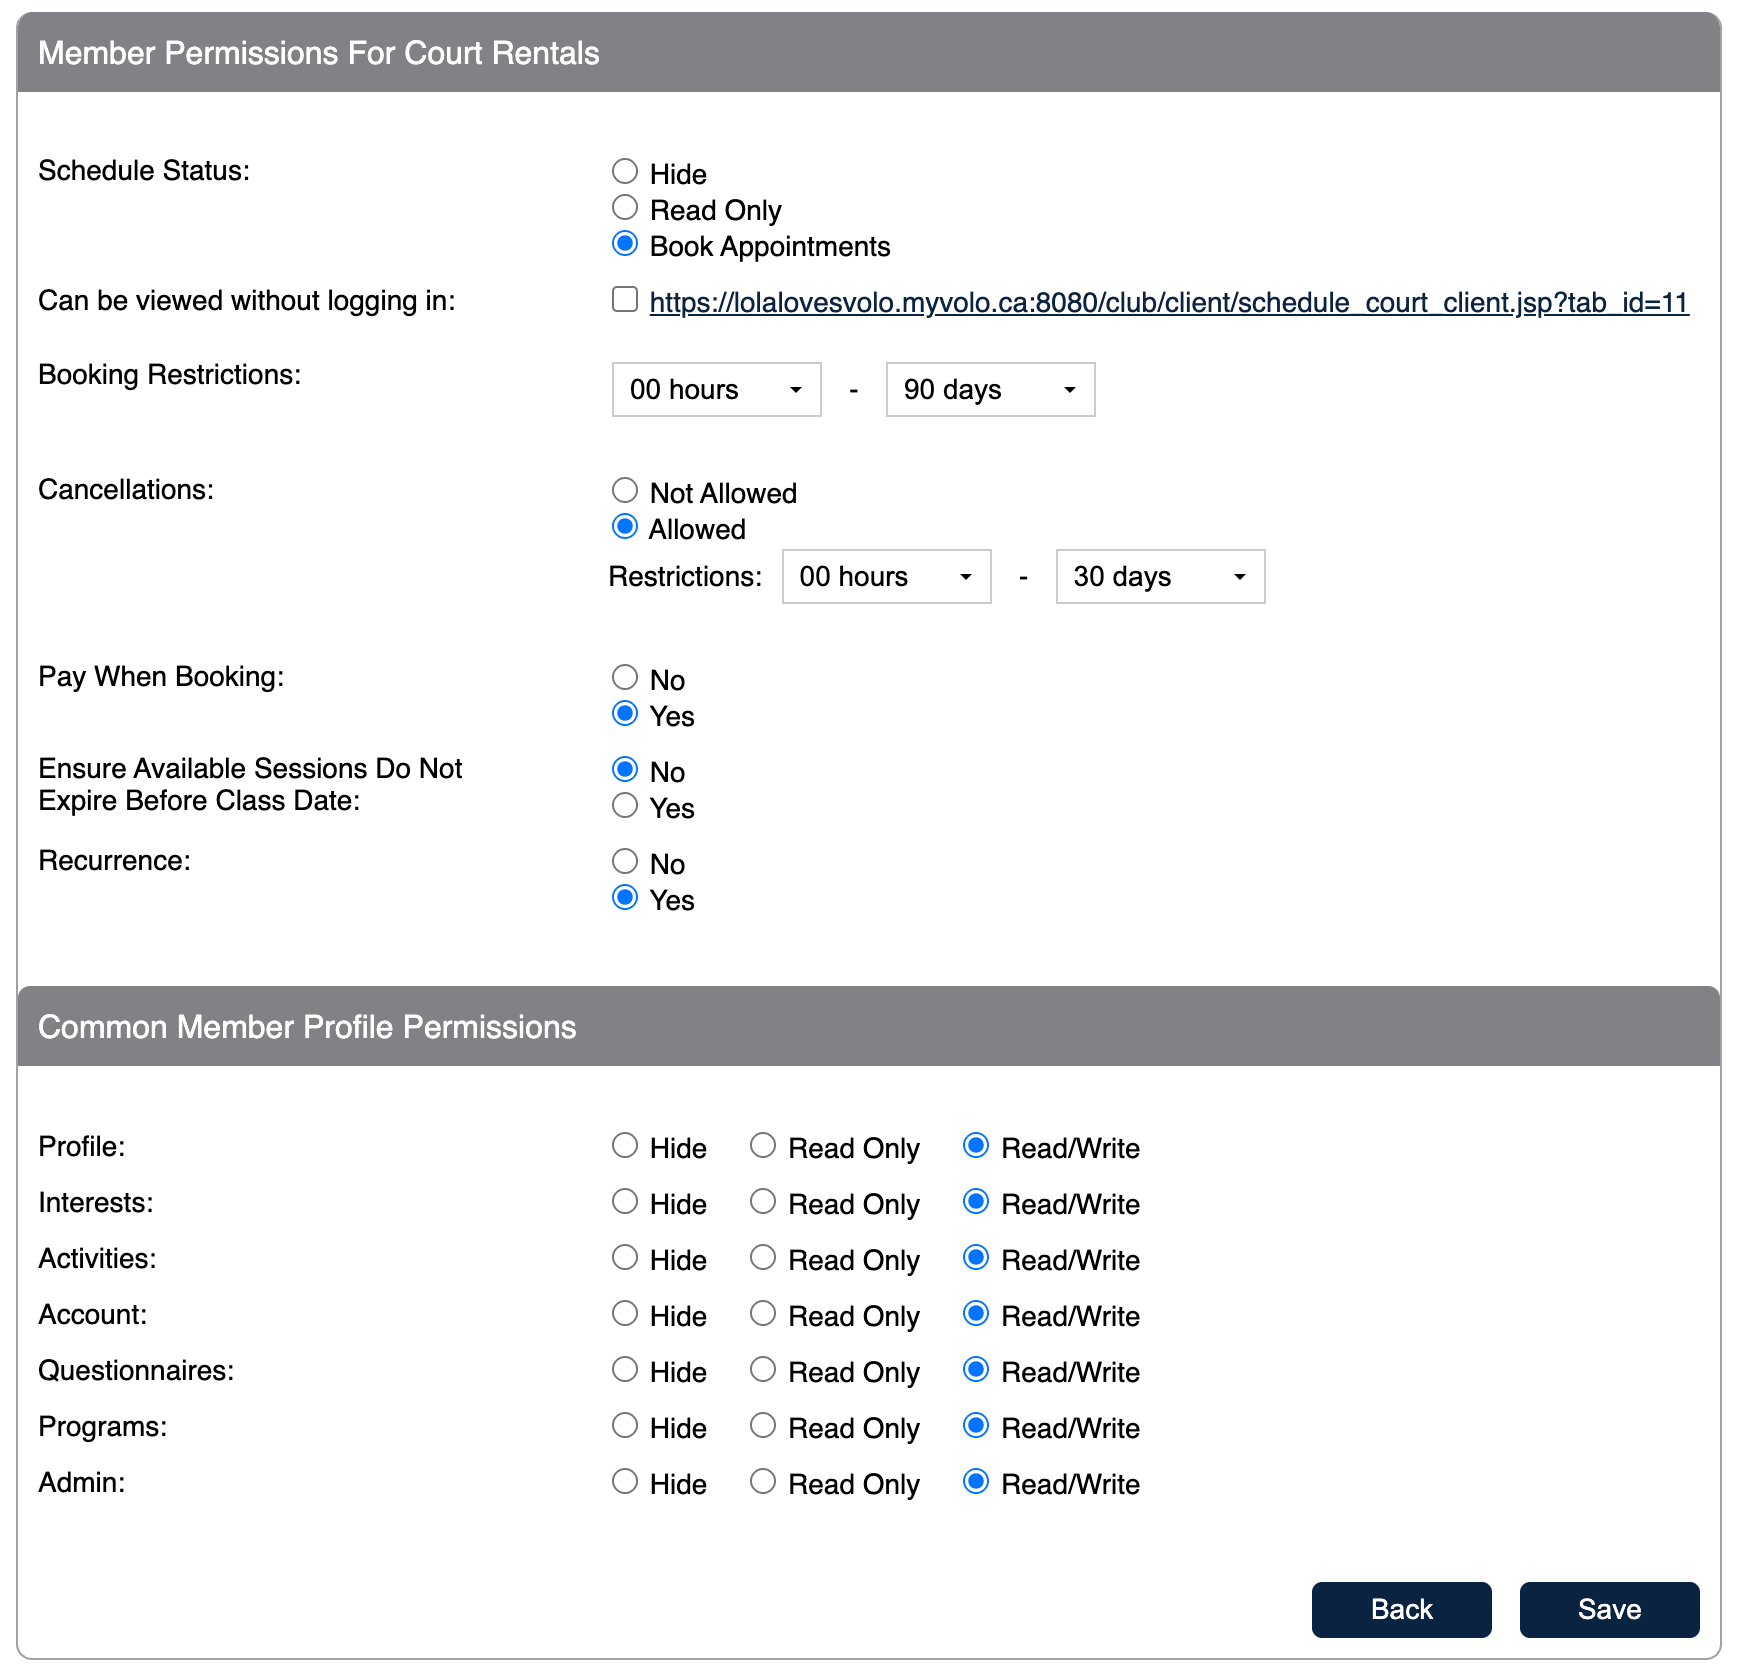
Schedule Permissions
| Field | Description |
|---|---|
| Schedule Status | Controls how members interact with the schedule: Hide (not visible to members), Read Only (visible but bookings not allowed), or Book Appointments (members can book). |
| Can be viewed without logging in | When checked, the schedule is publicly accessible via the displayed URL without requiring a member login. |
| Booking Restrictions | Sets how far in advance members can book, defined as a range from a minimum (hours) to a maximum (days). |
| Cancellations | Set to Not Allowed or Allowed. If allowed, a Restrictions range defines how far in advance a cancellation must be made. |
| Pay When Booking | If set to Yes, members must pay at the time of booking. |
| Ensure Available Sessions Do Not Expire Before Class Date | If set to Yes, the system checks that the member's sessions will not expire before the class date before allowing a booking. |
| Recurrence | If set to Yes, members can set up recurring bookings for this schedule. |
Common Member Profile Permissions
Controls what members can see and edit on their own profile when accessing this schedule. Each section can be set to Hide, Read Only, or Read/Write:
- Profile
- Interests
- Activities
- Account
- Questionnaires
- Programs
- Admin
Click Save to apply the permissions, or Back to return without saving.
Still need help?
If you can’t find what you’re looking for, our support team is happy to help.